Setting Up Rules in the Quote
In this step, we will configure discount rules in the Quote based on the data collected in the form. The salesperson selects the discount type, and this information is passed to the Quote, ensuring the correct discount is applied automatically.
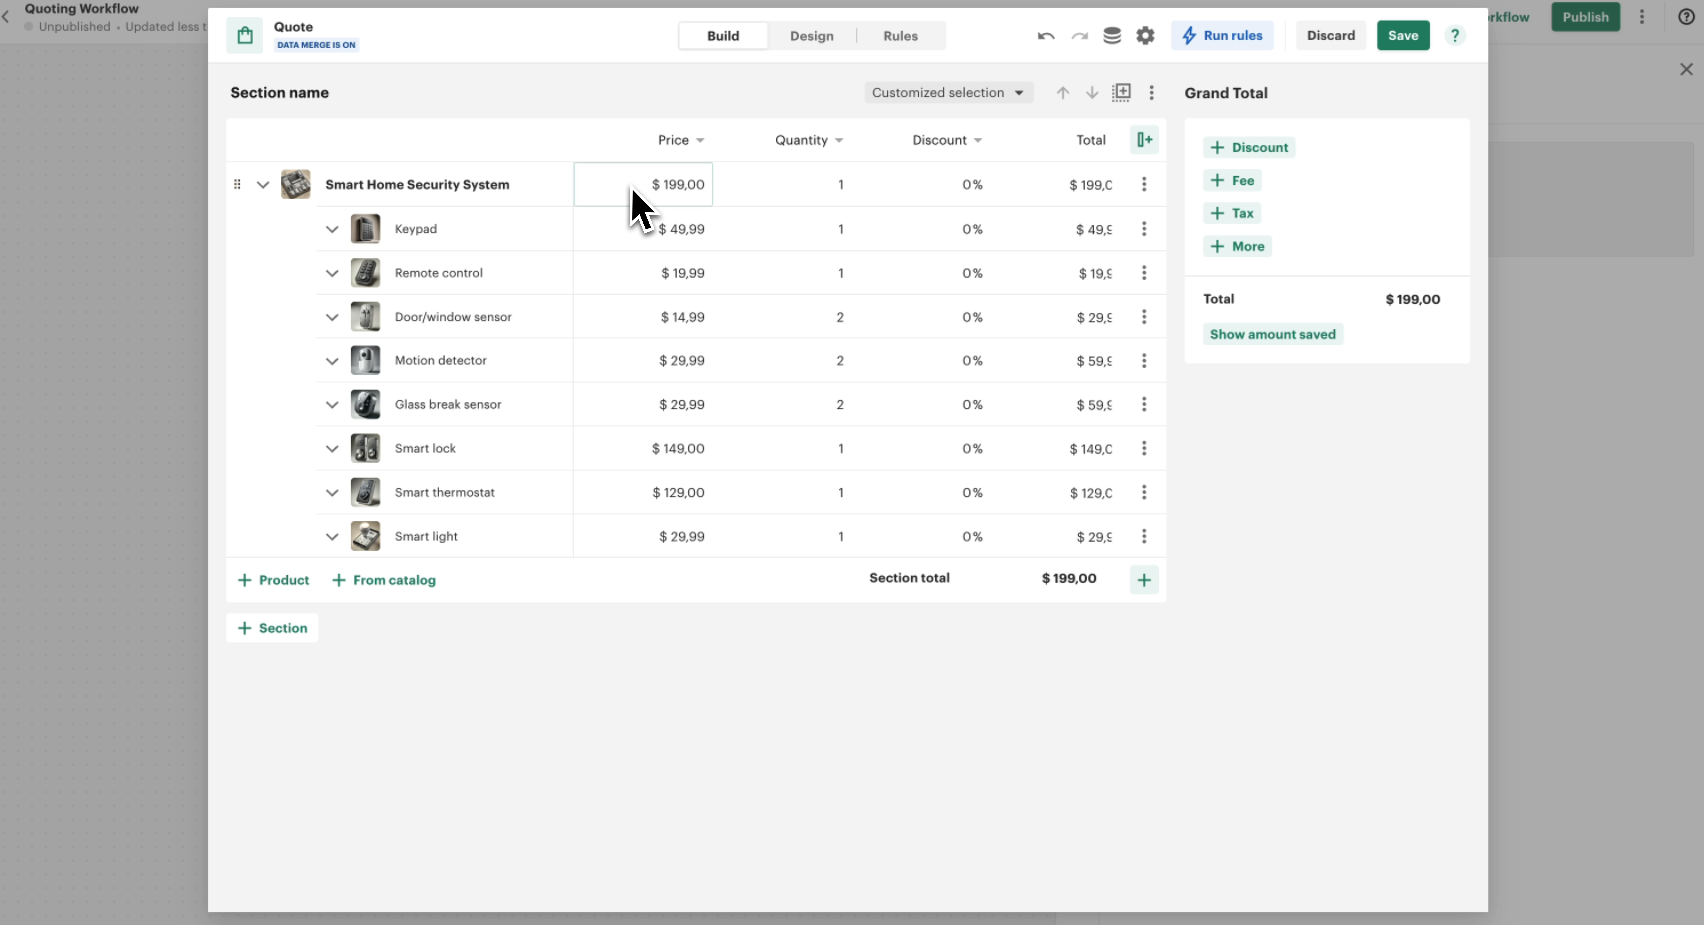
Step 1: Adding the Discount Column to the Quote
To display discounts in the Quote, we need to add a Discount column.
- Open the Quote editor.
- Click on + Add Column.
- Select Discount from the available options.
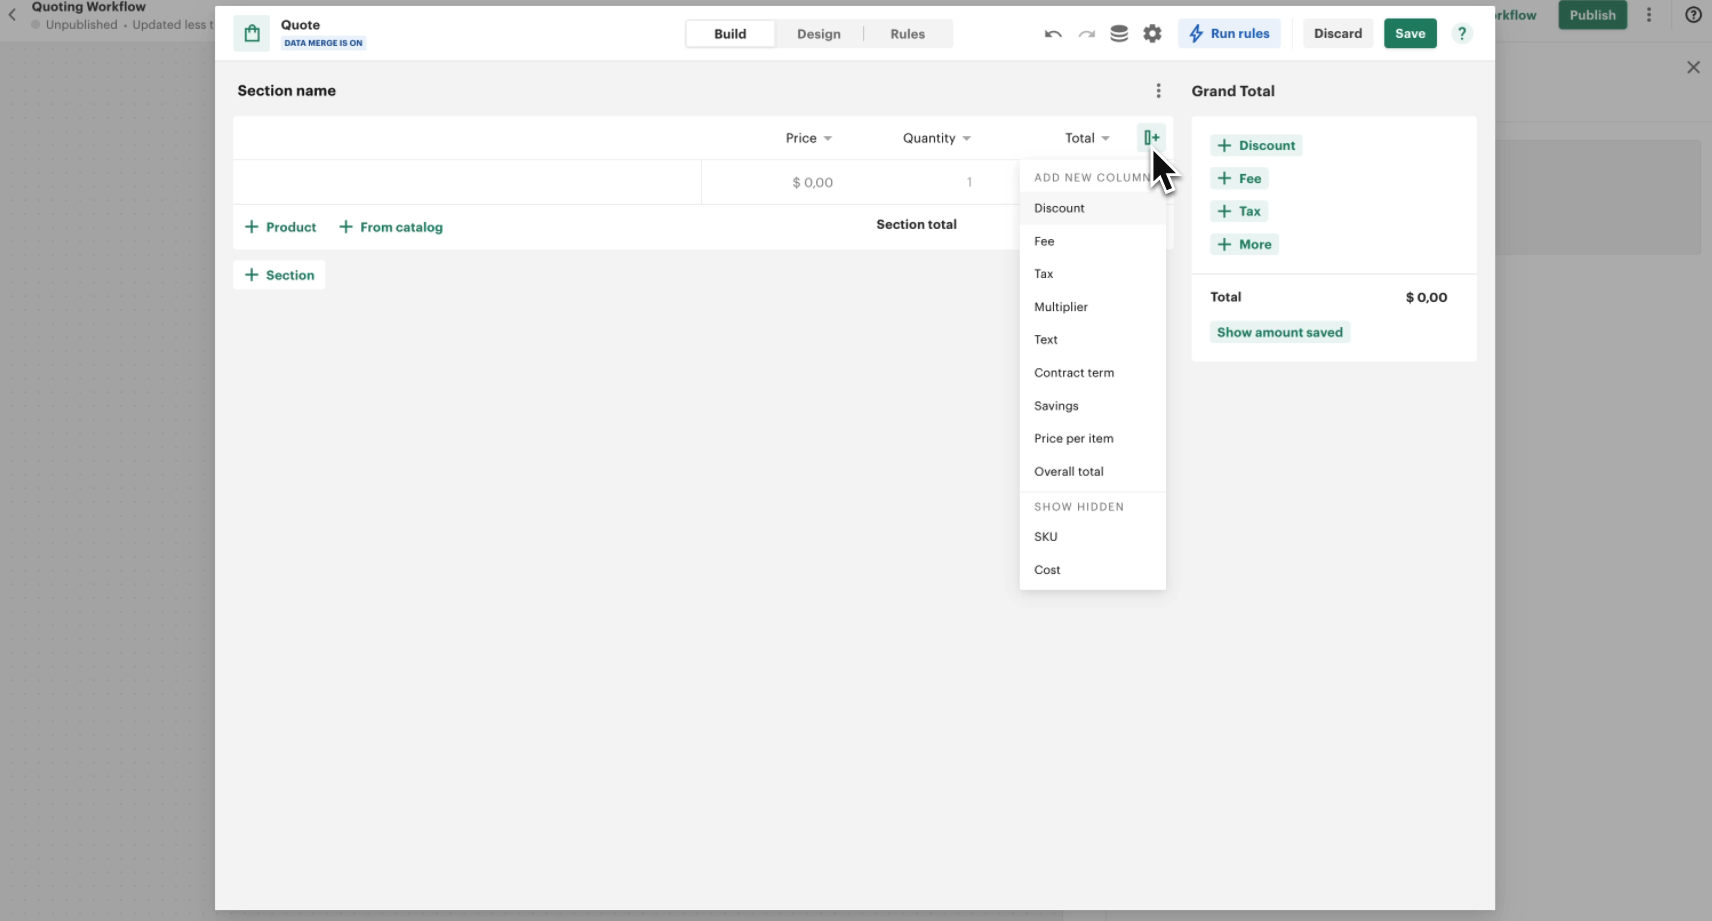
The Discount column supports both percentage and fixed amount discounts. You can specify the type in the column settings.
Step 2: Creating a Quote Data Field
Next, we need to store the discount type selected in the form.
- Open the Quote Data Fields section.
- Click + Add Field.
- Name the field Discount Type.
- Set the type to Short Text.
- Save the field.

Use clear, descriptive names for your data fields
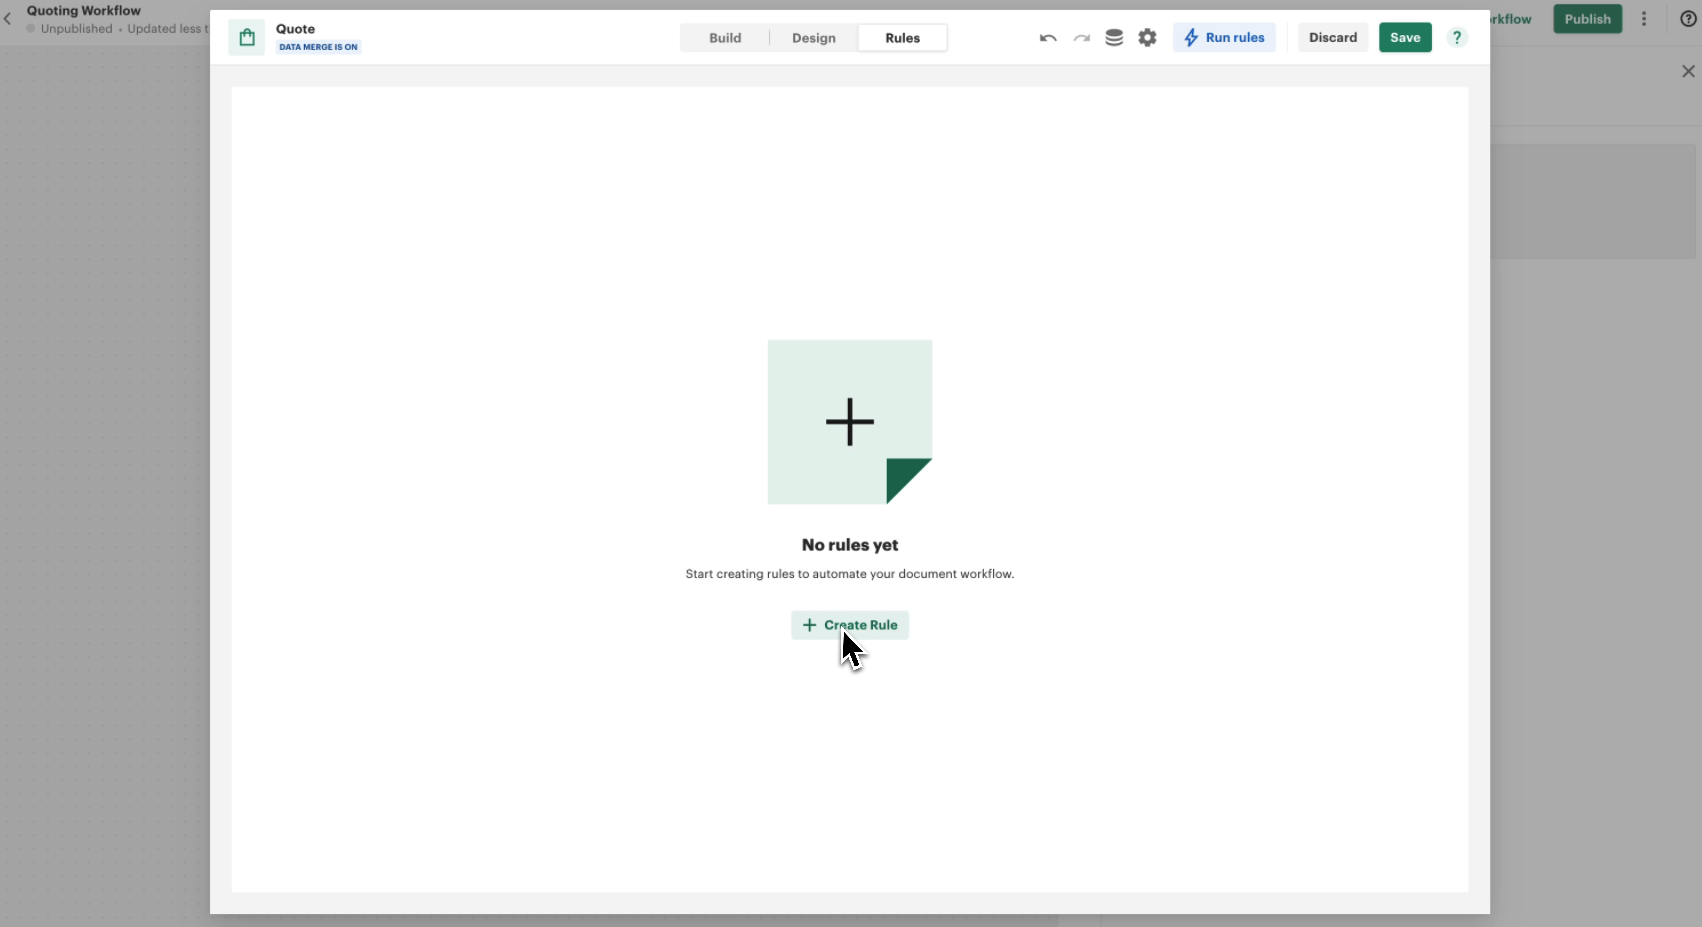
Step 3: Creating a Rule
Now, let's create the first discount rule.
- Navigate to the Rules section of the Quote.
- Click + Create Rule.
- Rename the rule to Military and First Responder Discount.
Define the Conditions
-
Select Line Items where Quantity > 0.
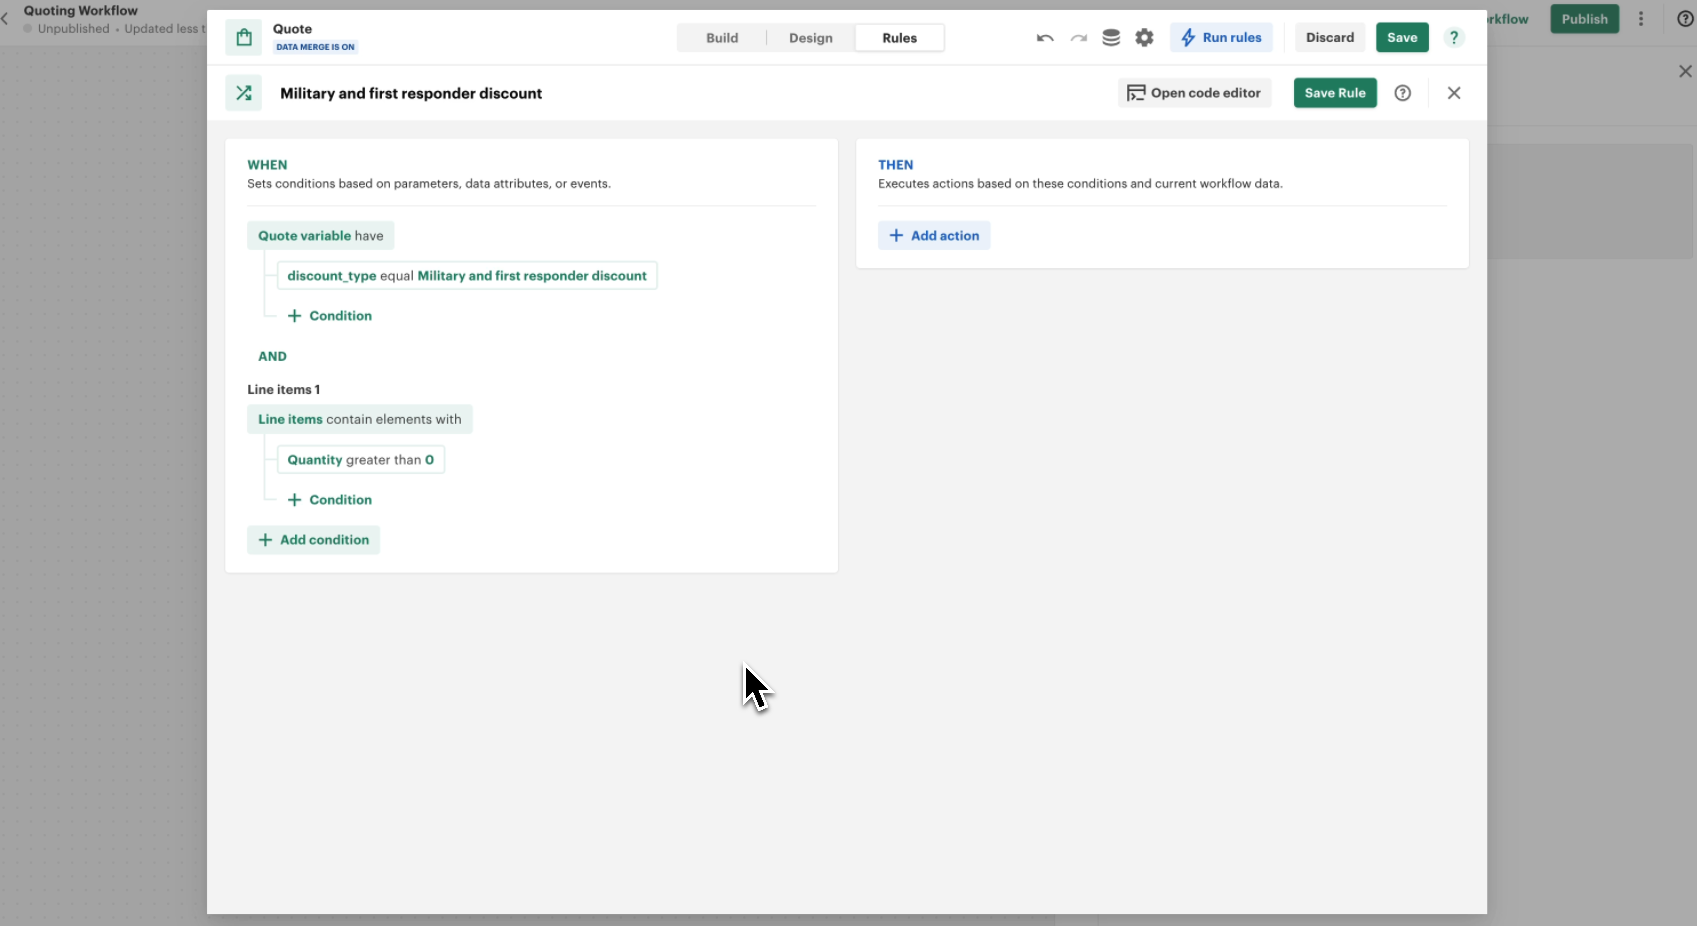
-
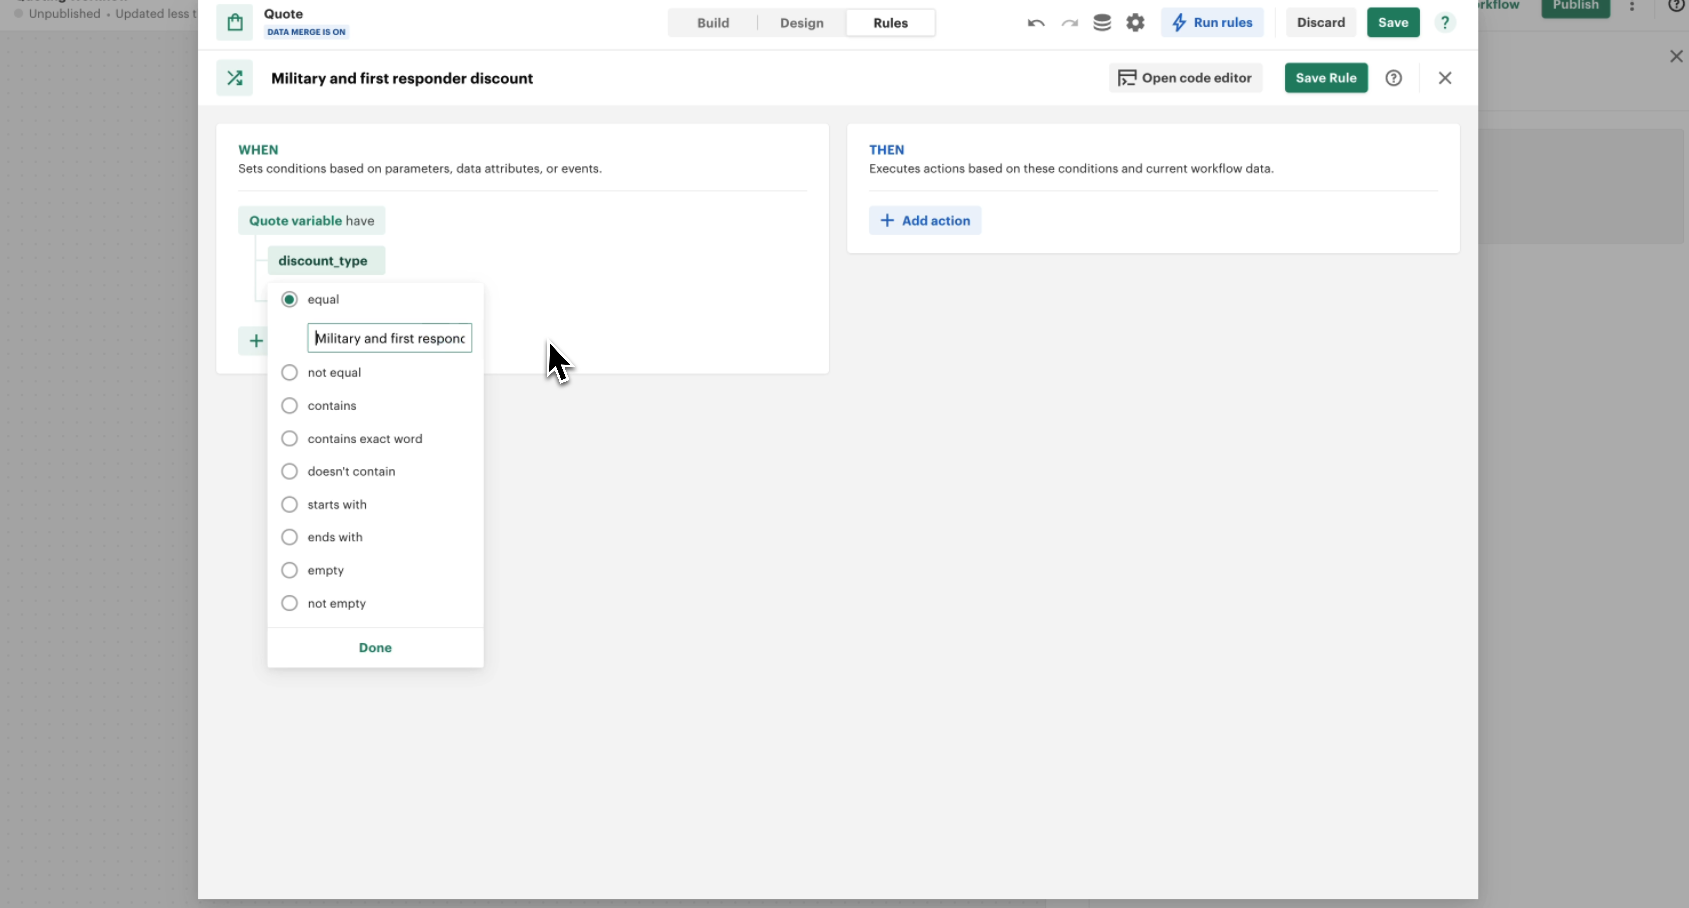
Check if the Discount Type equals Military and First Responder Discount.
Rules are executed in order from top to bottom. Learn more about Rule Execution Order.
Define the Action
- Set a 10% discount on all qualifying line items.
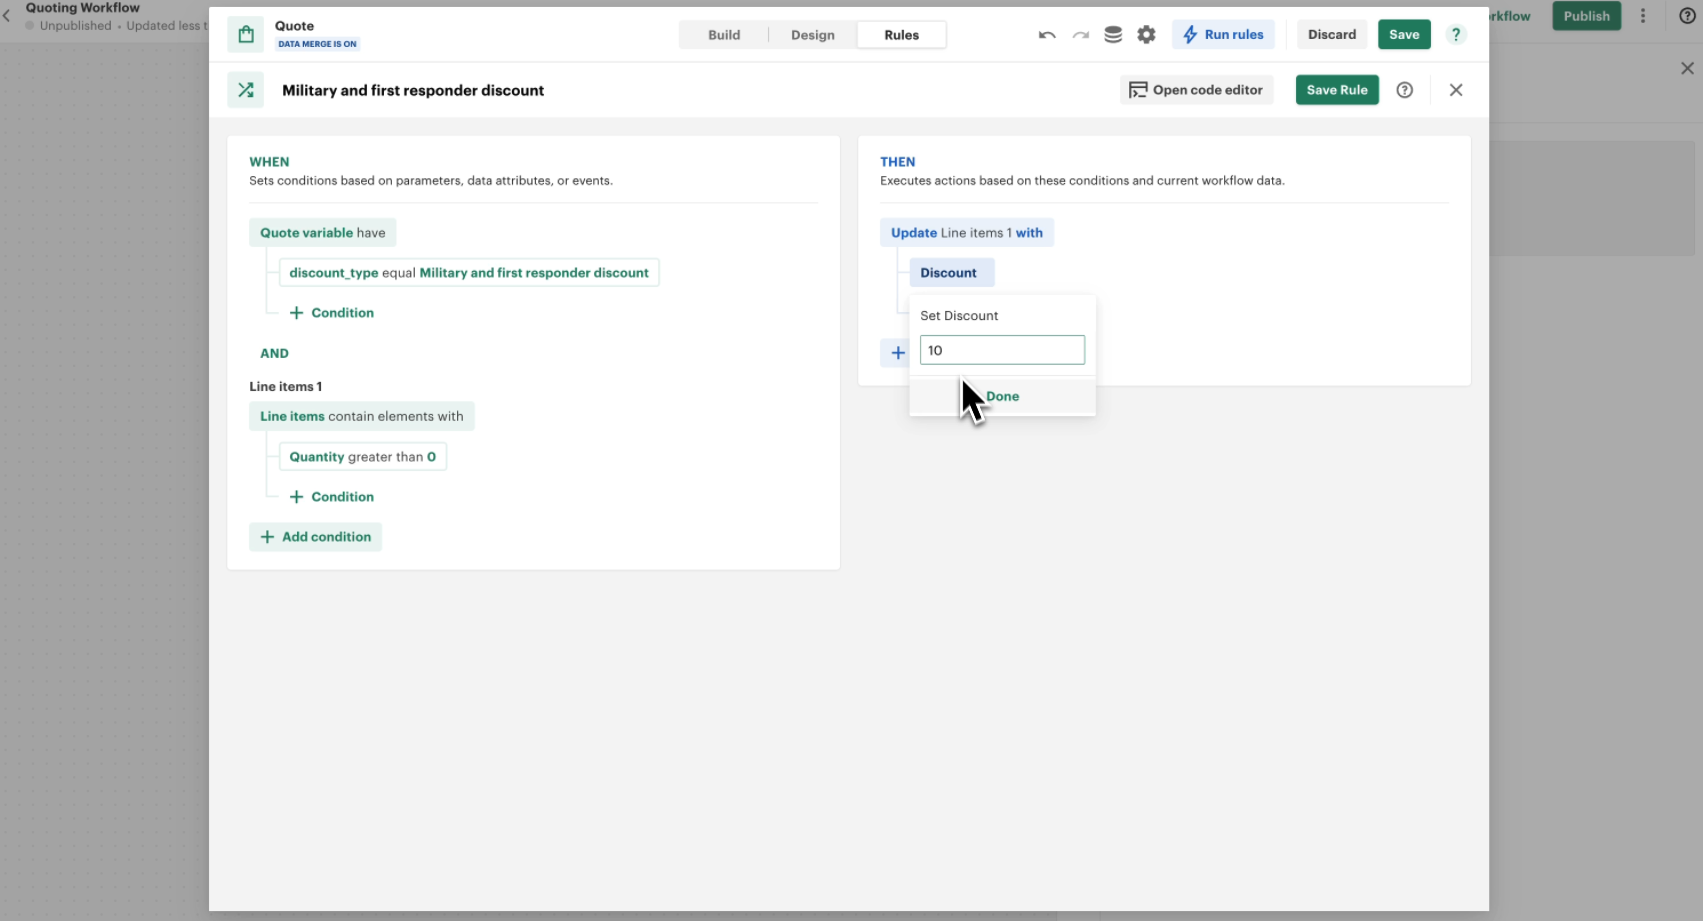
- Save the rule.
You can also:
- Use formulas to calculate dynamic discounts
- Apply different discount types (percentage vs fixed amount)
- Add conditions based on product categories See Advanced Rule Examples for more options.
Step 4: Testing the Discount Rule
To test the rule:
- Add a product to the Quote.
- Enter Military and First Responder Discount in the Quote Data field.

- Verify that the discount is applied correctly.
- Test with different product combinations
- Verify edge cases (zero quantity, maximum discounts)
- Check rule interactions if multiple rules exist
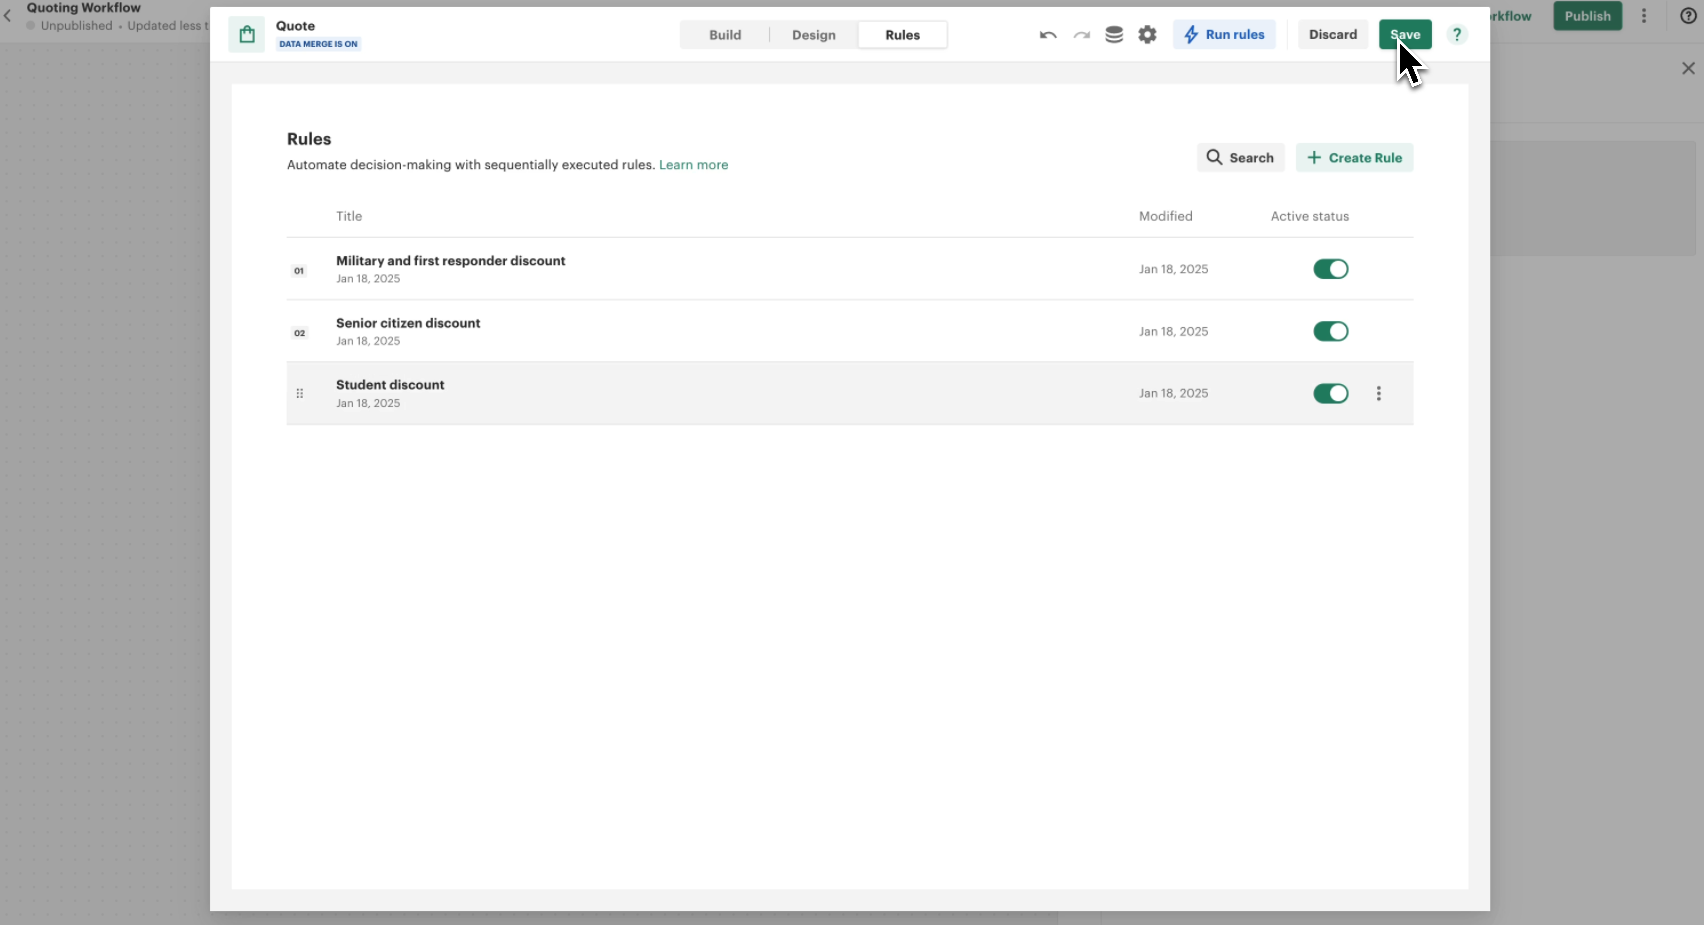
Step 5: Adding Remaining Discounts
Now, duplicate the rule and modify it for other discounts:
- Senior Citizen Discount → 15%
- Student Discount → 5%
Consider using Lookup Tables for managing multiple discount rates in one place.
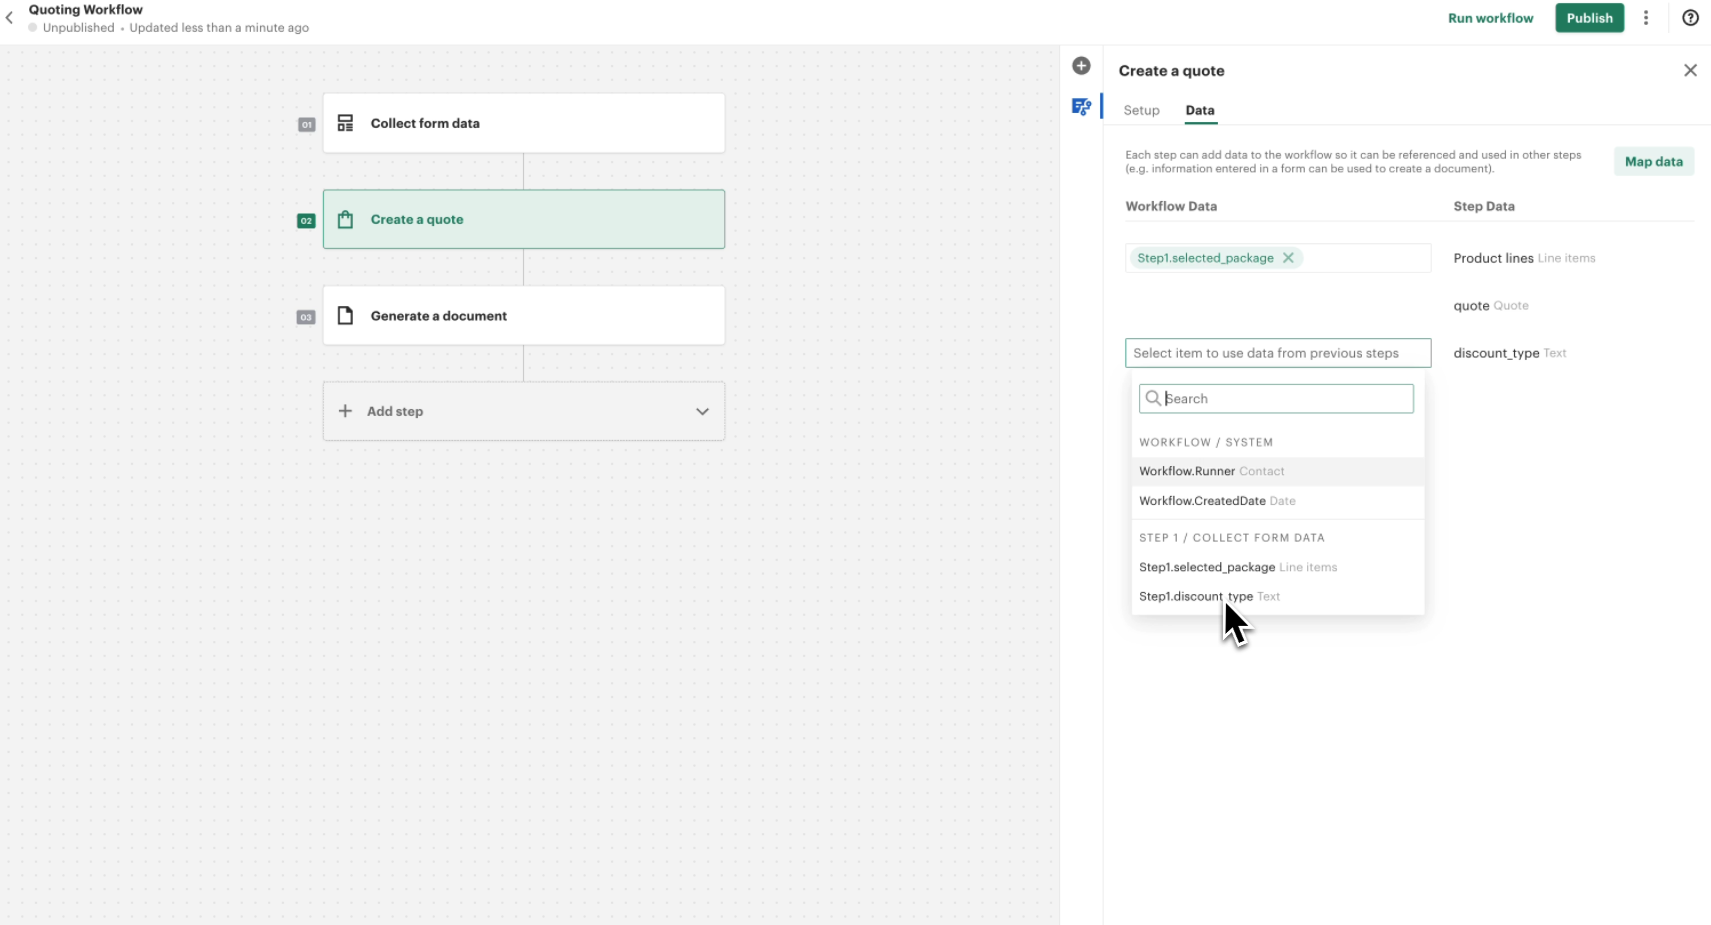
Step 6: Passing Discount Data from the Form to the Quote
Finally, we will pass the discount selection from the form into the Quote.
- Open the Data tab of the Quote step.
- Find the Discount Type field.
- Map it to the output of the form step.
- Save the Quote.
Troubleshooting Common Issues
- Rule not triggering: Verify the condition syntax and field names
- Incorrect discount amounts: Check the discount type settings
- Data mapping issues: Ensure form fields are properly connected
- Multiple rules conflict: Review rule execution order
Next Steps
- Learn about conditional content in documents
- Explore workflow management
- Set up custom volume-based discounting
Conclusion
With these discount rules in place, the system will automatically apply the correct discount based on the salesperson's selection. The next step in our guide is passing the Quote to the document.